# Cómo configurar un servidor VNC (GUI) en Ubuntu

## **Resumen**

La configuración de un [servidor VNC](https://xstar.es/Vps) con una interfaz gráfica de usuario (GUI) en Ubuntu agiliza la administración remota del servidor. Facilita interacciones fáciles de usar, especialmente para aquellos menos familiarizados con las operaciones de línea de comandos. Con un servidor VNC, los usuarios pueden conectarse de forma remota al servidor Ubuntu y realizar tareas a través de una interfaz visual, lo que simplifica actividades como la administración de archivos, la instalación de software y las configuraciones. La adición de una interfaz gráfica de usuario resulta particularmente beneficiosa para las aplicaciones que dependen de elementos gráficos o configuraciones intrincadas.

{% hint style="success" %}
Se requiere un cliente VNC como [RealVNC](https://www.realvnc.com/en/connect/download/viewer/).

Se requiere el [paquete VPS de 2 GB](https://xstar.es/Vps) o superior, ya que un VNC requiere más RAM y almacenamiento.
{% endhint %}

## **Cómo configurar un servidor VNC (GUI) en Ubuntu**

**1.** Inicie sesión en el servidor VPS utilizando un [cliente SSH](https://docs.xstar.es/juegos/servidores-vps/como-conectarse-a-un-servidor-vps-a-traves-de-ssh).\
\
**2.** Ejecute los siguientes comandos para **instalar los requisitos previos**:

<mark style="color:yellow;">`sudo apt update`</mark>\ <mark style="color:yellow;">`sudo apt install xfce4 xfce4-goodies`</mark>\ <mark style="color:yellow;">`sudo apt install tightvncserver`</mark>

<figure><img src="/files/yiwCk4PBu1nhhn0OQn3n" alt=""><figcaption></figcaption></figure>

<figure><img src="/files/EY88a0an0Bb9gH684PWY" alt=""><figcaption></figcaption></figure>

<figure><img src="/files/3WbvCczguo7T6J5myuRY" alt=""><figcaption></figcaption></figure>

**3.** Cuando se le solicite, ingrese <mark style="color:yellow;">`Y`</mark> y presione **Enter**.

<figure><img src="/files/EcYfKhqg6GahpGpXN8VL" alt=""><figcaption></figcaption></figure>

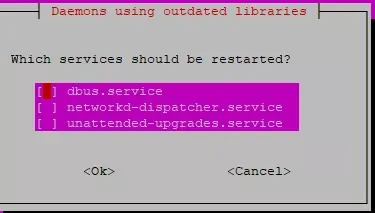
**4.** Cuando se le solicite, presione **OK** para reiniciar.

<figure><img src="/files/68MQpI2xb2rl2uQmNT2L" alt=""><figcaption></figcaption></figure>

**5.** Ejecute el siguiente comando para **configurar una contraseña VNC**: <mark style="color:yellow;">`vncserver`</mark>

<figure><img src="/files/7ZhSaZs7ylWf2iQ4FvpC" alt=""><figcaption></figcaption></figure>

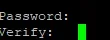
**6.** **Ingrese** una contraseña con un mínimo de <mark style="color:yellow;">`6`</mark> caracteres. Por razones de seguridad, la contraseña no aparecerá al escribir.
<figure><img src="/files/VUXlLpOkWhITP6zduhnf" alt=""><figcaption></figcaption></figure>

**7.** Cuando se le pida que introduzca una contraseña de solo lectura, **introduzca** <mark style="color:yellow;">`N`</mark> por ahora.

<figure><img src="/files/c7y7zpdM0kyr39h2PVP0" alt=""><figcaption></figcaption></figure>

{% hint style="info" %}
Ejecute el siguiente comando para cambiar la contraseña o agregar una contraseña de solo lectura: <mark style="color:yellow;">`vncpasswd`</mark>
{% endhint %}

**8.** **Inicie** el cliente VNC.

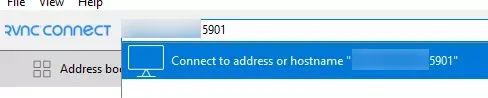
**9.** En la barra de direcciones, **ingrese** la dirección IP del VPS, el puerto <mark style="color:yellow;">`5901`</mark> y presione **Enter**. (Ej. <mark style="color:yellow;">`127.0.0.1:5901`</mark>)

<figure><img src="/files/e5O7YPxbYzDm3m1gt7FJ" alt=""><figcaption></figcaption></figure>

**10.** Cuando se le indique que la conexión no está cifrada, haga clic en **Continuar**.

<figure><img src="/files/52z1R20k9M1vQ9VbR512" alt=""><figcaption></figcaption></figure>

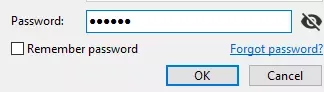
**11.** **Introduzca** la contraseña creada en el paso 6 y pulse **OK**

<figure><img src="/files/hBngtLf5P6rmhKuYwj4f" alt=""><figcaption></figcaption></figure>


---

# Agent Instructions: Querying This Documentation

If you need additional information that is not directly available in this page, you can query the documentation dynamically by asking a question.

Perform an HTTP GET request on the current page URL with the `ask` query parameter:

```
GET https://docs.xstar.es/juegos/servidores-vps-linux/como-configurar-un-servidor-vnc-gui-en-ubuntu.md?ask=<question>
```

The question should be specific, self-contained, and written in natural language.
The response will contain a direct answer to the question and relevant excerpts and sources from the documentation.

Use this mechanism when the answer is not explicitly present in the current page, you need clarification or additional context, or you want to retrieve related documentation sections.